GRAINBENCH ORIGINALS
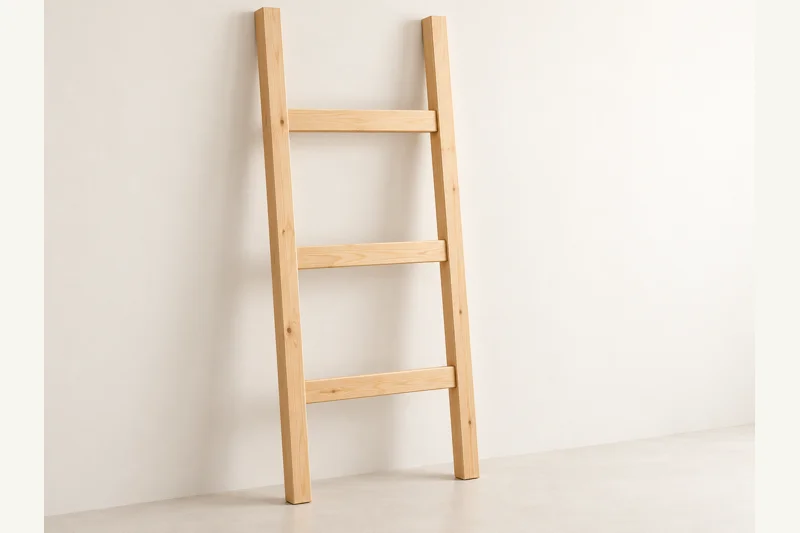
The Soft Landing Blanket Ladder
A slim decorative rack with three flat rungs for folded throws.
29 in W · 60 in stiles · approximately 59 in installed H
Printable drawings, a labelled cut list and nine assembly stages. No account or email required.
Common materials. Clear details.
Three common 1x3 boards.
Use straight, dry stock and check its actual thickness. The PDF lists quantities, hardware sizes, part labels and the cutting layout.
Shopping list
- 1x3 x 8 ft: 3 boards; actual 3/4 x 2-1/2 in. Two boards supply stiles and one supplies all rungs.
- Pocket screws: 12 x #8 x 1-1/4 in coarse-thread pocket screws for softwood, plus spares.
- Required installation: Non-slip foot pads and a furniture restraint compatible with the stiles and actual wall structure.
- Other supplies: Interior glue, sandpaper, finish and discreet wall-protection pads.
Before the first cut
Tape, square, pencil, supported crosscut saw, drill/driver, clamps, sander, and suitable eye/hearing/dust protection. Pocket-hole jig and bits, a saw capable of a controlled 10-degree bevel, and an angle gauge. Clamp narrow stock securely; never freehand the foot cuts.
Digitally checked; not physically built or load-tested. Follow the PDF’s fixing, stability and inspection instructions.
Your parts at a glance
Dimensions in inches. Stock names are nominal; finished dimensions are actual.
| ID | Part | Qty | Stock | Length | Width | Thickness |
|---|---|---|---|---|---|---|
| S | Stiles / long point | 2 | 1x3 | 60 | 2-1/2 | 3/4 |
| R | Flat rungs | 3 | 1x3 | 24 | 2-1/2 | 3/4 |
A clear way through
Keep the PDF beside you for the dimensioned drawings and drilling layouts.
01 Cut stiles (S) and rungs (R)
Square-cut three R pieces to 24 in. Cut S from separate boards, allowing each to finish 60 in to the LONG point of the bevelled foot. Top ends remain square. Mark front and rear faces so both foot bevels share the same orientation.
02 Bevel the feet of both stiles (S)
The foot needs a 10-degree BEVEL through the 3/4 in thickness, not a 10-degree mitre across the 2-1/2 in face. Use an angle gauge and a matching scrap test first. With S leaning 10 degrees from vertical, the cut must sit flat on the floor. Mirror the finished lengths; do not create left/right bevels that oppose one another.
03 Mark rung (R) locations on stiles (S)
On the marked FRONT face, measure from the long foot point along S and mark R lower edges at 12, 29 and 46 in. Extend square lines across both stiles and mark the 2-1/2 in rung height above each line. Check the 24 in space between S and the 29 in outside width.
04 Drill the rear faces of rungs (R)
Use #8 x 1-1/4 in coarse-thread pocket screws for the specified softwood, with a head approved for the jig. Set jig and stop collar for the actual 3/4 in stock. Test on matching offcuts, clamp square and drive at low clutch torque; check for splitting, stripping and projecting tips. Drill two pockets at each R end on its rear face, centred 5/8 and 1-7/8 in from the rung lower edge. Keep front faces of R and S flush during assembly. No pocket holes are needed in S.
05 Join rungs (R) to the first stile (S)
Place the front faces down on a flat bench so the front surfaces finish flush. Use the marks to align each R, glue its end, clamp at a right angle and drive two screws into the first S. Support all rungs and do not let them hang from a single joint.
06 Fit the second stile (S)
Glue the free R ends, position the second S to its matching lines, clamp and fasten the other six screws. Check both stiles are parallel and the frame diagonals match. Keep the 24 in gaps consistent; allow the glue to cure with the assembly supported square.
07 Sand and finish stiles (S) and rungs (R)
Ease exposed edges lightly by hand, leaving joining faces square. Sand with 120 then 180 grit as appropriate and remove dust. Test the finish on an offcut. Follow its preparation, ventilation, application and full cure directions. Remove every snag from the rungs and ease their long edges gently so blankets are not caught. Fit non-slip pads across the bevelled foot contact surfaces after the finish cures.
08 Set the lean angle and restrain stiles (S)
Place on a level floor, leaning about 10 degrees from vertical. Confirm both feet lie flat and their pads grip. Fit discreet wall-protection pads, then secure the upper stile structure to suitable wall structure with the furniture restraint, following its maker's directions. Do not rely on friction or fix only to a rung.
09 Inspect rungs (R), stiles (S) and restraint
Check all joints, foot contacts and wall restraint before adding a few lightweight throws. Keep the floor space clear. Correct rocking, sliding, splits, loose screws or snagging surfaces before use. Never present or use this decorative rack as a climbing ladder.
A little help along the way
You may sell your finished makes. Please keep the plan files and images with GrainBench. Plan usage terms → · Questions or corrections?
Another simple thing to make
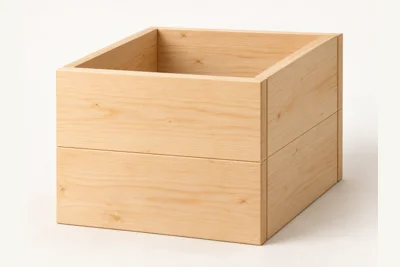
The Simple Square Planter Cover
GrainBench Originals
An open-bottom wooden sleeve that dresses up a separate plant pot and saucer.
12-1/2 in W × 12-1/2 in D × 11 in H
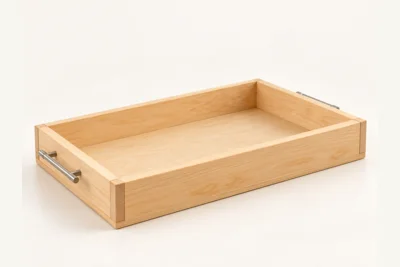
The Everyday Serving Tray
GrainBench Originals
A simple tray with a plywood base, low sides and two cabinet-pull handles.
20 in W × 14 in D × approximately 3 in H