GRAINBENCH ORIGINALS
The Weekend Potting Bench
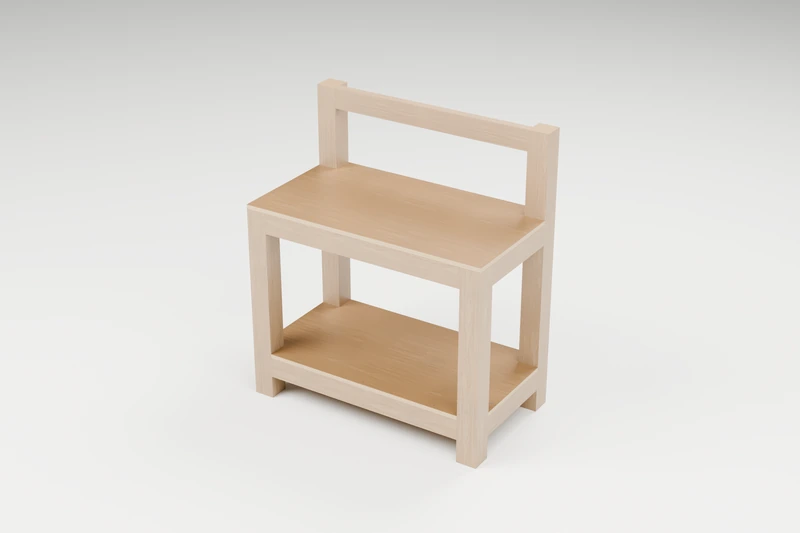
An outdoor potting bench with continuous square rear posts, flush 2x4 rails and a plywood worktop and lower shelf. Worktop 34 in high.
42 in W × 23 in D × 48 in H
Printable drawings, a labelled cut list and step-by-step assembly instructions. No account or email required.
Common materials. Clear details.
4x4 and 2x4 lumber and 3/4 in plywood.
Use straight, dry stock and check its actual thickness. The PDF lists quantities, hardware sizes, part labels and the cutting layout.
Shopping list
- 2 x 4x4 board, 8 ft: For L front posts, U full-height rear posts
- 3 x 2x4 board, 8 ft: For A front and back rails, E end rails, G upper tool rail
- 1 x 3/4 plywood, 4 ft x 4 ft panel: For B lower shelf blank - 4 notches, T worktop blank - 2 rear notches
- 2-1/2 in exterior coarse-thread pocket-hole screws: 36 used: A 16, E 16, G 4; buy a box of 50 for setup and spares
- #8 x 1-1/2 in exterior flathead wood screws: 24 used: 12 each for T and B; buy a box of 50 for setup and spares
- Exterior wood glue: One small bottle; follow its clamp and cure times
- Sandpaper: 120 and 180 grit
- Exterior finish: About 1 L (1 quart), depending on coverage; seal faces, undersides, cut ends and notches
Before the first cut
Saw for accurate post and rail crosscuts; use a supported setup suitable for 4x4 stock; Circular saw and straight-edge guide for plywood, or store-cut blanks; Jigsaw for the square post notches; Pocket-hole jig for 1-1/2 in stock, stepped bit, stop collar and long driver bit; Drill/driver, suitable wood pilot bit and countersink bit; Tape, pencil, square, straightedge and two clamps opening at least 42 in; Sanding tools, eye/hearing protection and dust protection.
Digitally checked; not physically built or load-tested. Follow the PDF’s fixing, stability and inspection instructions.
Prepare before you cut
Stock, fitting and drilling checks
Use straight, dry softwood: 4x4 posts (actual 3-1/2 in square), 2x4 rails (actual 1-1/2 x 3-1/2 in) and exterior-rated 3/4 in plywood. Reject twisted posts and badly cupped boards. Match the two front-post lengths exactly. Buy 2 eight-foot 4x4s, 3 eight-foot 2x4s and one 4 x 4 ft plywood panel. The plywood uses a light natural presentation tone with visible layered edges; it is not a required species or stain. Finished sizes are below. Square one end before measuring, cut matching parts together and label each ID. Allow 1 in per board for squaring and 1/8 in saw kerfs. Cut T and B as matching 42 x 23 in blanks, then cut their different notches. Do not cut both blanks as 24 in strips: two such strips plus a saw kerf will not fit a 48 in sheet.
For ordinary wood screws, make a clearance hole in the first piece and a pilot in the receiver; use the screw maker’s bit sizes. Pocket holes use the jig’s own setup. Trial the actual joint on scrap, including the countersink, then check both faces for tips before fastening the project.
Your parts at a glance
Dimensions in inches. Stock names are nominal; finished dimensions are actual.
15 parts from 4x4, 2x4 and 3/4 plywood.
| ID | Part | Qty | Stock | Length | Width | Thickness |
|---|---|---|---|---|---|---|
| L | Front posts | 2 | 4x4 | 33-1/4 | 3-1/2 | 3-1/2 |
| U | Full-height rear posts | 2 | 4x4 | 48 | 3-1/2 | 3-1/2 |
| A | Front and back rails | 4 | 2x4 | 35 | 3-1/2 | 1-1/2 |
| E | End rails | 4 | 2x4 | 16 | 3-1/2 | 1-1/2 |
| G | Upper tool rail | 1 | 2x4 | 35 | 3-1/2 | 1-1/2 |
| T | Worktop blank - 2 rear notches | 1 | 3/4 plywood | 42 | 23 | 3/4 |
| B | Lower shelf blank - 4 notches | 1 | 3/4 plywood | 42 | 23 | 3/4 |
A clear way through
Keep the PDF beside you for the dimensioned drawings and drilling layouts.
01 Mark the faces and drill the rails
Mark the inward face and top edge of all A/E rails; mark the back face of G. Set the jig and bit stop once for 1-1/2 in stock and use 2-1/2 in pocket screws. Test on matching scrap first. Drill 2 pockets at each end, on the marked face, with centres 7/8 and 2-5/8 in from the top edge. Keep the parts clamped while drilling. There are 36 pocket holes in total.
02 Make the two lower end frames
Pair one short front post L with one continuous rear post U. Mark a line 4 in above the bottom of each. Clamp one lower E between them with its bottom on the lines, outside face flush with the outside post faces, and pockets facing inward. Check square, glue the rail ends and drive 2 pocket screws into each post. Repeat for the opposite end. Keep both U posts at the back.
03 Join the lower frame and square it
Fit the two lower A between the end frames at the same 4 in bottom-edge marks, with outside faces flush and pockets inward. Clamp, glue and drive 2 pocket screws at each end: 8 screws for the pair. Set all four posts on a flat surface, match the corner-to-corner diagonals and check for rocking. Keep the upper A/E rails and G off until the lower shelf is installed.
04 Cut and test the lower-shelf notches
Mark four 3-1/2 x 3-1/2 in corner notches in B, one around each actual post. Use a square; cut inside the waste and ease the cut to the line. Test the fit against the actual stock, allowing only the small sliding clearance needed for assembly and finish. Keep the blank at 42 x 23 in: the notches remove just the four corners.
05 Lower the shelf onto the rails
With the upper rails still off, lower B over the rear posts first, then over the front posts. Its four notches clear the posts, and its underside rests flat at 7-1/2 in on all four lower rails. The outside edges align with the post outside faces. Confirm direct bearing all around; do not force the panel or enlarge a notch to hide a misplaced rail. Clamp it flat before drilling.
06 Fasten the lower shelf
Use the panel fixing diagram below: 3 screws into each of the four rails. Mark the rail centre lines on B, then predrill through the plywood into the rail, using a pilot appropriate for the screw and wood. Countersink only enough for a flush head. Drive 12 of the 1-1/2 in flathead screws; keep the panel flat and do not strip the holes. The same fixing pattern is used for T later.
07 Fit the upper end and long rails
Mark 29-3/4 in above the ground on every post for the upper rail bottoms. Fit the remaining two E and two A, with outside faces flush and pockets inward. Their top edges must finish level with the L post tops at 33-1/4 in. Clamp, check square, glue and use 2 pocket screws per rail end: 16 screws for these four rails. Leave G off for worktop access.
08 Notch the worktop around the rear posts
T needs only TWO notches, both at the rear. Mark each rear post position on the 42 x 23 in blank and remove the two 3-1/2 in squares shown. Keep the front corners whole: they will rest on the short front posts. Test T around the rear posts before finishing, and seal every notch edge. The rear posts are full length; do not cut them into separate upper and lower pieces.
09 Fit and fasten the worktop
Lower T around the continuous rear posts onto the upper rails and front post tops. Align its outside edges flush with the frame; its finished top is 34 in above the ground. Check that both end rails sit directly below the tabletop edges. Clamp, use the same fixing coordinates shown for B, predrill/countersink and install the remaining 12 panel screws. Do not use the long pocket screws through the plywood.
10 Fit the upper tool rail last
Clamp G between the two rear posts, with its top at 48 in, front face flush with the rear post fronts, and pocket holes facing backward. Glue the ends and drive 2 pocket screws into each post: 4 screws total. There are no separate back-upright strips or screws attaching uprights behind the legs.
11 Finish and make the final checks
Ease exposed edges, sand to 180 grit and coat all faces, undersides, notch cuts and post ends with exterior finish. Follow the finish and glue cure times. Check the frame is square and level, all panels bear directly on their rails, fastener heads are flush, and no tips protrude. Recheck after moving the bench.
A little help along the way
You may sell your finished makes. Please keep the plan files and images with GrainBench. Plan usage terms → · Questions or corrections?
More simple things to make
OUTDOOR & GARDEN · CONFIDENT BEGINNER
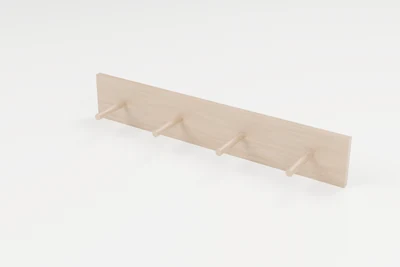
The Garden Peg Rack
A wall board with four round pegs for hand tools, hats and twine in a shed or garage. The pegs are glued into shallow sockets and locked in with a screw from behind.
↔︎ 32 × 5-1/2 × 5-1/2 in✓ Cut list
View plan & downloadQuick PDFDownload
OUTDOOR & GARDEN · BEGINNER
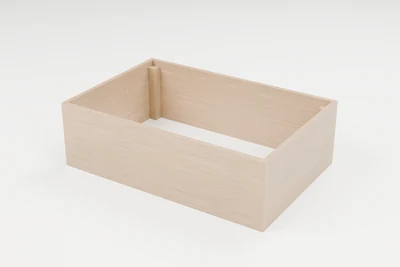
The Little Green Raised Bed
A small open-bottom raised bed, two boards high, with corner posts inside. Six 1x6 boards and a 2x2 make the whole thing.
↔︎ 36 × 24 × 11 in✓ Cut list
View plan & downloadQuick PDFDownload
WORKSHOP · CONFIDENT BEGINNER
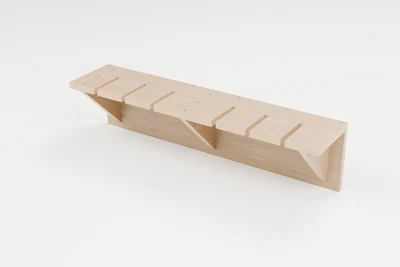
The Maker's Clamp Rack
A wall shelf with six open slots that holds bar clamps by their heads. The slotted shelf is plywood, so the fingers between slots are strong in every direction.
↔︎ 32 × 7-1/4 × 8 in✓ Cut list
View plan & downloadQuick PDFDownload